
Technicians Must Read: Go and No-Go Gauges Are More Than Just “Metal Rings”
If you have worked long-term in a machining or assembly workshop, you may have seen this “strange phenomenon”:
A production line is rushing to meet a deadline. The inspection department confidently declares, “All dimensions are within spec!” Yet at the assembly station, no matter how hard the workers try, the shaft just won’t fit into the hole. Experienced operators sweat profusely but still fail to assemble it.
The design engineers measure the drawings — everything looks fine. The quality engineers check the parts — all dimensions are nominal. The machining supervisor inspects the machines and tooling — everything normal.
So the problem becomes mysterious: If the dimensions are correct, why won’t it assemble?
Even more strangely, sometimes the opposite happens: parts deemed “out of tolerance” pass assembly easily; within the same batch, a novice may measure them as OK while an expert measures them as not OK; even the same gauge may read differently between day and night shifts.
Finally, someone sends the gauges for calibration and discovers: the Go gauge has worn smaller by several microns; the No-Go gauge has been forced repeatedly and its opening has expanded. The long-term quality fluctuations were actually caused by measurement distortion from worn gauges.
All seemingly “mysterious” assembly issues point to one fact: whether a part fits or not is not determined by the machine or worker skill, but by the assembly boundaries defined by Go and No-Go gauges.
Go Gauge Pass Does Not Mean Easy Assembly
Many beginners think a Go gauge merely checks the diameter against the lower limit. But if only diameter mattered, micrometers, bore gauges, or pneumatic measuring instruments could provide higher precision.
The true value of the Go gauge comes from the Taylor principle — it simulates the actual mating shape of the part.
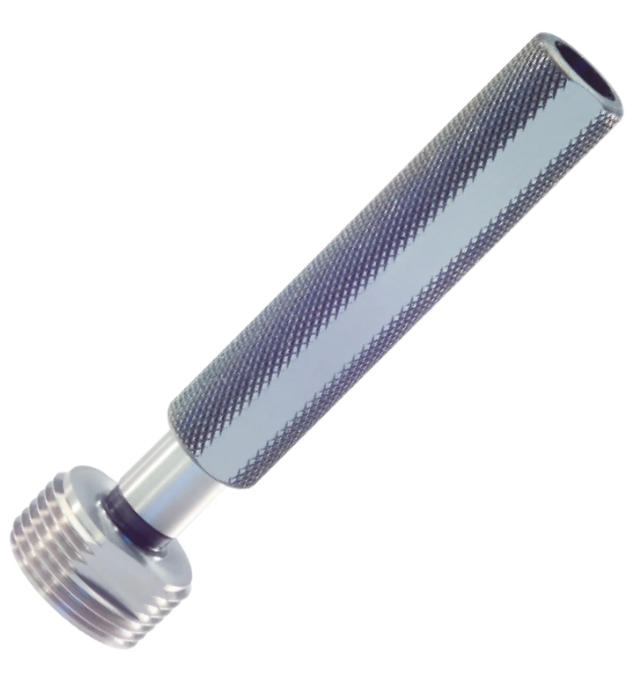
- A Go gauge is designed longer not for ease of handling, but to simulate the real forces when a shaft enters a hole.
- During insertion, it checks not only diameter but also straightness, roundness, taper, and other geometric errors.
- Any slight bend, ovalization, or local constriction will cause the Go gauge to jam immediately.
For example, a three-point measurement of a hole may show perfect compliance, but if the hole is slightly bent or has a “waist” defect, a three-point bore gauge may not detect it, whereas a long Go gauge under real insertion conditions will reveal whether the shaft truly fits.
Go gauges protect the “functional assembly boundary,” not just a single geometric dimension.
Why No-Go Gauges Are Short

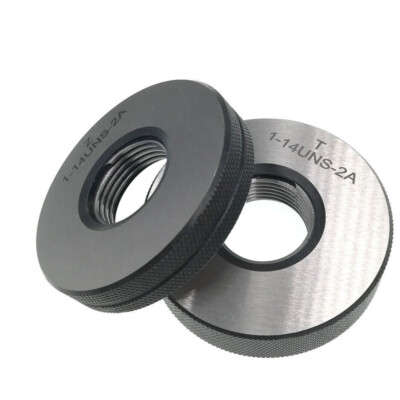
The No-Go gauge determines whether the hole is too large.
- It is often short and compact to avoid contact with shape deviations.
- Its sole purpose is to check if the hole exceeds the upper tolerance limit.
- If a No-Go gauge is too long, small burrs, tool marks, or uncleaned spots may block it, giving a false impression that the hole is undersized.
- A short, refined No-Go gauge bypasses local shape errors and accurately checks for over-sizing.
Key point: the shorter and simpler the No-Go gauge, the more accurate the maximum material verification.
Common Misuse: Thread Gauges and Snap Gauges
Thread Gauges: Follow the “Two-Thread Rule”
- The No-Go thread gauge checks the pitch diameter, not how smoothly it turns.
- According to international standards, the No-Go gauge can screw in but must not exceed two threads.
- If it goes in too easily, the pitch diameter is too large, reducing thread strength and risking stripping or failed assembly.
- A common misuse is thinking “the smoother, the better,” which may allow defective threads to pass.
Snap Gauges: Operator Technique Matters
- Snap gauges measure shaft diameters. Their C-shaped frame has slight elasticity. Forcing the shaft into the gauge can expand the jaws, causing a false pass.
- As a result:
- Novices push hard → “OK”
- Experts guide lightly → “Not OK”
- Correct use relies on a gentle, controlled feel. The gauge should pass with slight resistance, not force.
Hidden Factors: Temperature and Measurement Posture
High-precision measurement is highly sensitive to environmental and operational factors.
Thermal Expansion Trap:
- Newly machined parts can reach 40–50°C. Metals expand, making holes temporarily larger, so the Go gauge passes easily. After cooling, the hole shrinks and assembly jams.
- For IT6 or higher precision parts, measurements must be taken at stable temperature.
Slide, Don’t Push:
- A Go gauge should slide under its own weight. Any pushing, forcing, or shaking indicates inaccurate measurement.
- In horizontal measurements, simply guide with fingertips. Micron-level measurement favors minimal force.
Gauge Life Management: Worn Go Gauges Are the Most Dangerous “Hidden Certificates”
- Go gauges wear faster than No-Go gauges due to repeated insertion.
- Once the Go gauge becomes smaller, holes that should fail may be falsely judged as OK, allowing defective parts into the assembly line.
- Consequences: assembly jams, line stoppages, or equipment damage.
Management Recommendations:
- Maintain a gauge register
- Calibrate and record trends regularly
- Confirm wear compensation during procurement
- Check gauge surfaces for scratches or corrosion before use
- Focus monitoring on critical gauges
Even small gauges can be the most overlooked risk in quality systems.
Conclusion: Go and No-Go Gauges — The First Line of Defense for Interchangeability
- Go and No-Go gauges endure in mechanical manufacturing because they uphold the fundamental principle of interchangeability.
- Through simple pass/fail checks, they translate complex tolerance concepts into intuitive, low-cost quality verification.
- They require no power, no software, and never “fail to update,” yet they catch most defects that could cause assembly problems.
Go and No-Go gauges may seem simple, but they are the invisible backbone of industrial quality stability.